Showing posts with label chicken. Show all posts

Sunday, February 17, 2013

Sweet and Sour Chicken

Perfection. Thats all I have to say. This recipe is so easy and yummy! Far better than any chinese restaurant and there aren't all those nasty preservatives and heavens knows what else in it!

Preheat Oven to 350'F


Chicken

3-5 chicken breast or 6-8 Chicken Tenders
salt and pepper
1 cup cornstarch (or enough to coat the chicken) 
2 eggs, beaten
2 tbsp oil


Veggies and Pineapple

1/4 of green pepper sliced
1/4 of yellow pepper sliced
1/4 of red pepper sliced
1/4 onion sliced
1 can of pineapple chunks


Sauce:

1 cup brown sugar
4 Tablespoons ketchup
1/2 cup apple cider vinegar
1 Tablespoon soy sauce
1 teaspoon garlic powder
1 teaspoon ginger
red pepper flakes
1 tablespoon cornstarch 

Directions:

Thaw out your chicken and trim off fat and "weird" pieces. Cut into 1 inch squares

In a bowl beat the two eggs till smooth

In a large zip lock bag, put in 1 cup of cornstarch salt and pepper.

Dip your chicken pieces in the egg then place in zip lock bag. 

Twist up the top of the bag...or seal it...and shake shake shake. I kinda had to massage the pieces of chicken while in the bag to get them coated well. 

Heat up oil in skillet and dump your chicken onto the skillet. Cook until outsides are golden brown. 


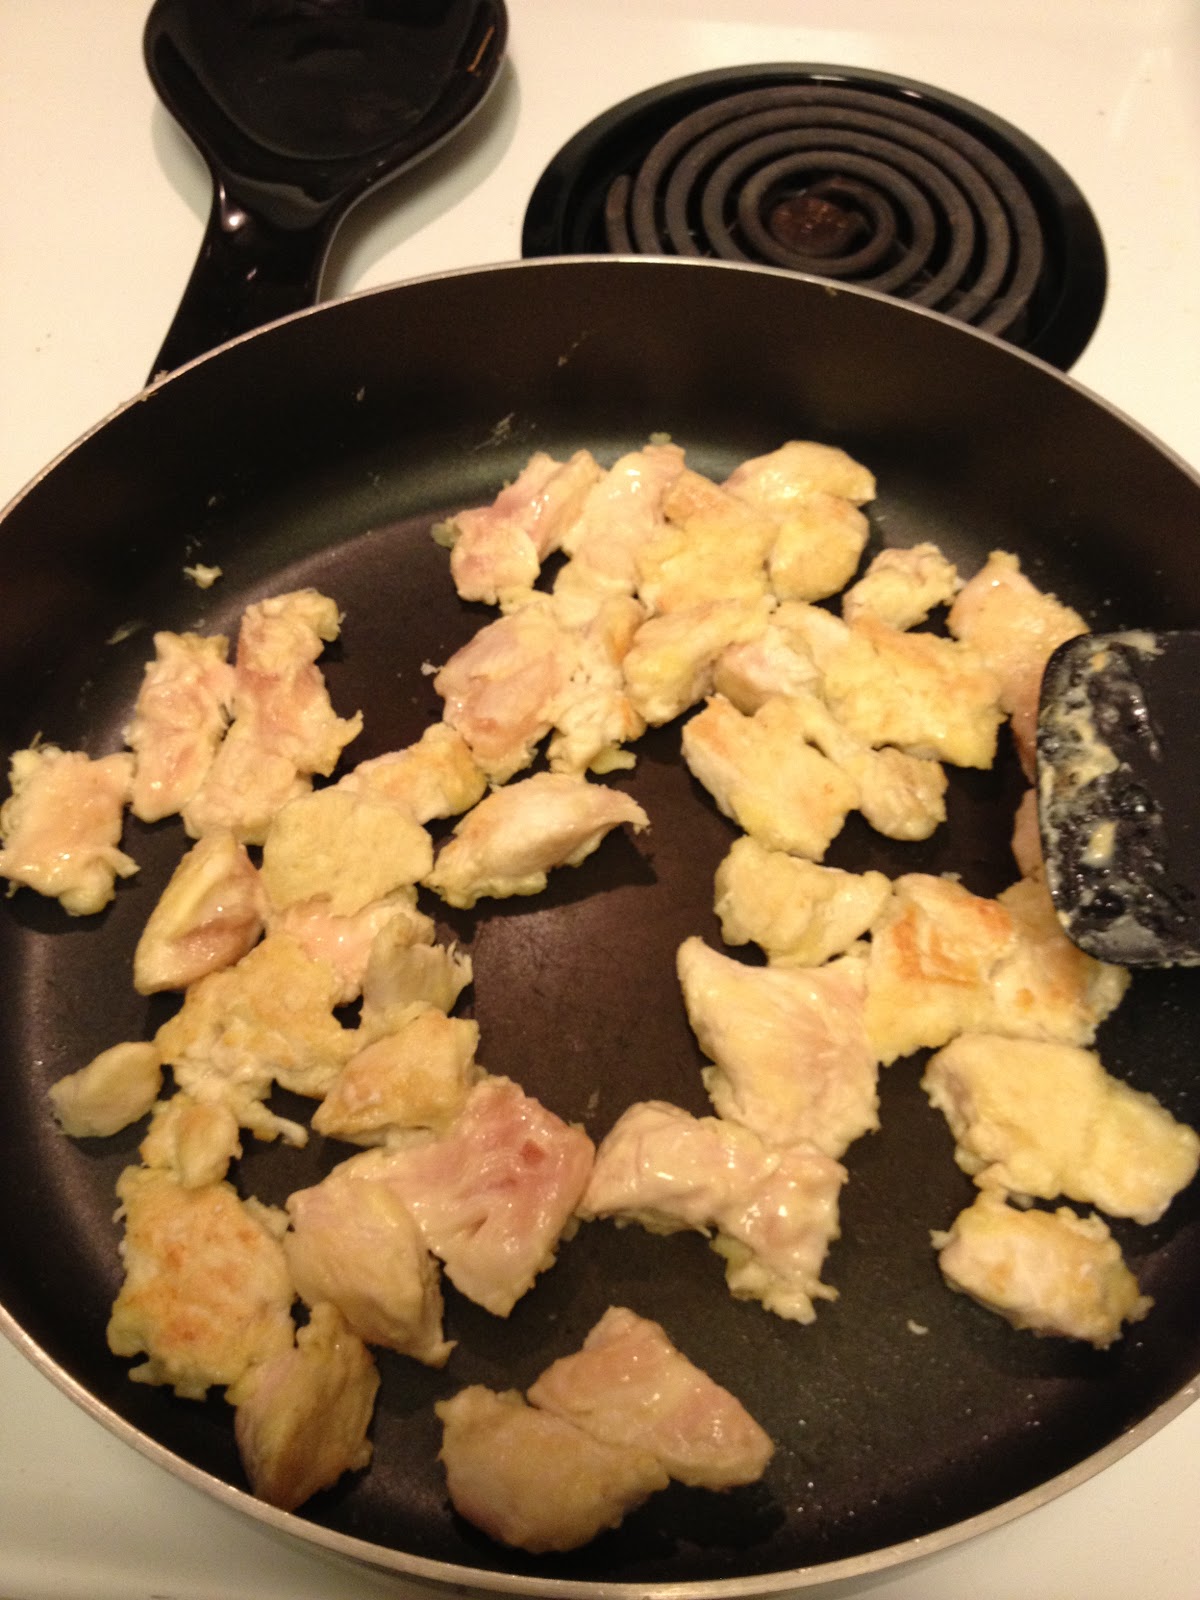
Place Chicken in baking dish. 


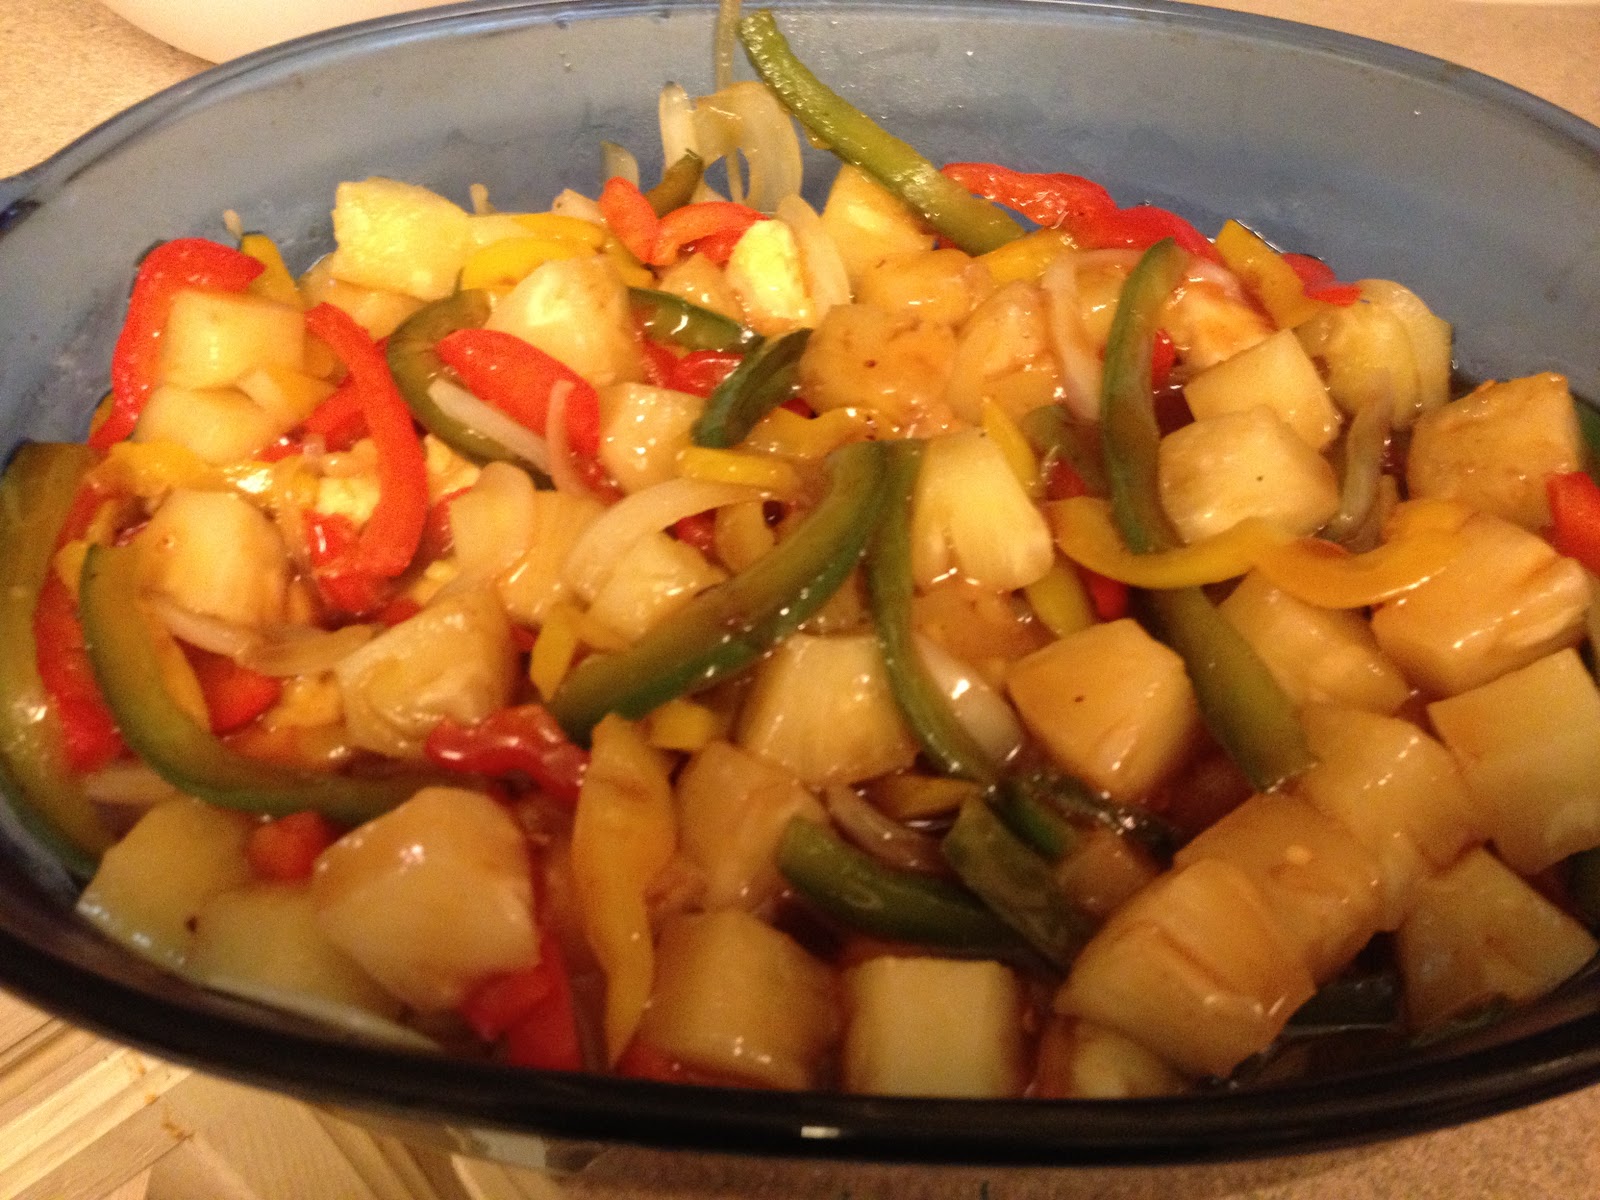
Adding a little more oil if needed, cook peppers, onion, and pineapple till tender and pineapple is browned slightly 


While that is cooking prepare your sauce


Whisk all ingredients until smooth then pour over chicken


Once the veggies are cooked add them to the baking dish, stirring them into the sauce. 


Bake at 350'F for 15 minutes. Stir then bake for another 15 minutes till sauce is thickened.


Serve with rice or any of your other favorite stir fry veggies. 


You will not be disappointed! This recipe is awesome! 


Thursday, February 14, 2013

Cornflake Crusted Chicken (Gluten Free)

Going gluten free has been one of the best decisions I have made for my health. It really isn't that hard once you put your mind to it. Some say, "Oh I just don't know how you do it!" I suggest quitting cold turkey. There is no easy way to say goodbye to little debbie, subway and all those horribly wonderful fried foods. Just walking away and not looking back is the only way to really do it. I have been gluten free for almost 10 months! Haven't cheated once, sadly though, cross contamination happens whether you want it to or not. The best thing about going GF, is you are forced to be creative. You can no longer just order pizza cause you are too lazy to cook dinner, and while yes, McDonalds is still an option, why would I go pay 6 dollars for a salad I can make at home? Cause thats really all you can get when it comes to fast food. So YAY for being creative. This recipe was so good, I'm making it two nights in a row. Which really doesn't happen often. It gives you the texture of those wonderful fried chicken fingers, but doesn't require any frying or flour. It doesn't get easier than this. So here we go:

Ingredients

4 boneless skinless chicken breasts (6 boneless skinless chicken tenders)
3 cups cornflakes (gently smashed so the flakes aren't so big)
2 tablespoons melted butter
1 large egg
1tsp water
Salt
Pepper
Poultry Seasoning or Cajun Spice

Preheat Oven to 400'F

Line a baking sheet with foil (I DEFINITELY recommend this. Makes clean up so much easier!)

Directions


  • Pat salt, pepper, and poultry seasoning of your choice onto both sides of chicken (I used cajun spice and montreal chicken spice to give ours a kick)
  • Mix egg and water in a bowl
  • Mix melted butter and cornflakes in separate medium sized bowl
  • Dip chicken into egg bowl coating both sides well
  • Then dip egged chicken into cornflakes being sure to fully coat the entire piece
  • Place on foil lined baking sheet
  • Once all pieces are coated and on baking sheet, put some more flakes on the top of the pieces just to make sure they had a good coat. (toss out leftover cornflake mixture) You shouldn't have very much leftover though. 
  • Then if you are crazy like we are, sprinkle red pepper flakes over the top of the pieces to make them even a little spicier :) Of course you don't have to use any spicy toppings. It would be just as good with just salt and pepper and a poultry seasoning. 
  • Place in preheated oven for 30 minutes or until done. 
Now, if your man, or yourself, is anything like my hubby... food is always dunked in some sort of sauce. BBQ, Ketchup, Mustard, Ranch...its rare a meal is eaten by him without some sort of dip. So I got creative for him. :) 

I did this by taste, so I really have no clue on measurements...but here is a guess.

Spicy Ranch Dip

1/2 cup ranch dressing
3 tablespoons of chili seasoning
1 tsp garlic powder
pinch of salt
Red pepper flakes to taste

Honey Mustard Dip

1/2 cup mayonase
2 tablespoons mustard
2 tablespoons honey
1/2 tablespoon lemon juice

ENJOY


Thursday, June 28, 2012

Winging it with Chicken

I love cooking! I can't say I am very good at it. Most things just happen by accident, and I am notorious for "winging it" when it comes to recipes. Cooking is always exciting and can bring such a great sense of accomplishment when you start something new and it turns out magnificently. Last night was one of those nights. Baked whole chicken, Yes Please!

The most difficult thing about baking a whole chicken, is making sure it is thawed. Which can take quite some time. If you are wanting to speed things up, fill up the sink with cooler water and place the chicken in the sink. Or you can just let the water run over the chicken. It took about 2 hours in the sink for my chicken to thaw.

First thing, preheat oven to 375' F.

Once the chicken is thawed, add 2 tbsp of lemon juice, 1/4 cup of water and 1/4 cup of olive oil in a bowl. Gently mix in parsley, thyme, italian seasoning, and roasted red pepper flakes, be generous with the spices. It will give your chicken GREAT flavor. Feel free to add any other seasoning you would like. Pour the mix over the top and bottom of chicken and rub it over the whole chicken. Being sure to coat the wings and legs. I stuffed the inside of the chicken with 1/4 chopped green pepper and half a small onion sliced. If your chicken has a pop-up timer, make sure the pop-up timer is in clear view when you place your chicken in the pan.

After the chicken is seasoned and placed in a deep pan, dice up red potatoes and fresh carrots. Place the potatoes and carrots around the chicken in the bottom of the pan and sprinkle with thyme.

Put on middle rack in preheated oven. Set timer for 2 Hours. If your chicken has a pop-up timer that will make cooking it fully, much easier. When in doubt, check the temperature with a meat thermometer. It should read 180'F.

                      This is on my to-buy list, I can never remember what temperature I need to reach


The key to getting that crispy skin is basting. Periodically throughout the 2 hours. Pull the chicken out of the oven and use a turkey baster or spoon to scoop up the liquid and run it over the top of the chicken. I did this about every 30 minutes. The chicken will produce its own juices which can be later used as gravy or cooking other projects.

When the pop-up timer pops up, turn the oven up to 425'F and cook for another 10 minutes to really get the skin crispy.

This was by far the best chicken I have ever made! I could eat chicken daily and never get sick of it. For the first time baking a whole chicken, it turned out fantastically.

The only thing I would do differently next time, is add way more carrots. The flavor of everything plus the carrots was awesome.


P.S. Yes...this meal was completely GF!

A huge thanks to my friend Cara on this one! She offered some great tips and guidance in making this chicken amazing! Check out her blog! http://twogoldenspoons.blogspot.com/