Showing posts with label recipe. Show all posts

Friday, August 17, 2012

Sweet Pickle Relish

 If you are new to the world of canning this is a great starter project. It is easy, uses only a few ingredients and super yummy!

There are a few things you will need to make this process easier. Stainless steel bowls, measuring cups, knife, chopper, and a food mill. Luckily my sis-in-law had one that I could borrow. The food mill makes chopping the cucumbers much easier. It preserves the juices and texture of the cucumber.


The consistency your cucumbers should be

Yield about 8 half pints
  • 4 cups chopped cucumbers (about 4 medium)
  • 2 cups chopped onions (about 2 medium)
  • 1 cup chopped sweet green pepper (about 1 medium)
  • 1 cup chopped sweet red pepper (about 1 medium)
  • 1/4 cup canning salt
  • 3 1/2 cup sugar
  • 1 tablespoon celery seed
  • 1 tablespoon mustard seed
  • 2 cups cider vinegar


Combine chopped cucumbers, onions, green and red peppers in a large bowl. Sprinkle with salt and cover with cold water. Let stand 2 hours. 

Then start to prepare your jars. After washing them thoroughly with hot soapy water, put in water bath canner and bring to a boil to sterilize. Leave them in covered canner till ready to use. Or you can use another separate pot to boil the jars and the lids in, I found this method easier. If you are so blessed to have a dishwasher, you can put them in the dishwasher as well. You need them hot when you put the relish in them. Never put hot liquid in a cold jar. 

While you are waiting the 2 hrs for your ingredients to soak, you can prepare your second batch by chopping up more vegetables. This way you keep the ball rolling and there is no down time. 

Once the two hours is up:
  • Drain; rinse and drain thoroughly. 

  • Combine sugar, spices and vinegar in a large sauce pot. Bring to a boil. 

  • Add drained vegetables; simmer 10 minutes. 

  • Remove sterilized jars from the water bath canner and place on counter

  • Bring that water back to a boil, you can add a little bit of vinegar to the water in your water bath canner to keep the mineral deposits off the jars. 

  • Pack hot relish into hot jars, leaving 1/4-inch headspace. 

A batch will typically be 8 half-pints. My 2nd and 3rd batch I was able to get 9 jars. It just depends on how accurately you measure out your ingredients. 

  • Remove air bubbles by tapping side of jar or using a knife along the inside of the jar
  • Wipe off rim of the jars with a damp paper towel to ensure a tight seal
  • Adjust two-piece caps securely, don't tighten the rings too tight, you need the air in the jars to be able to escape. 
  • Process 10 minutes in a boiling water-canner. 

After the 10 minutes of processing:

  • Turn off the range
  • Using a jar lifter, remove the jars from the canner and place on a kitchen towel
  • When you hear a popping sound, that is the jars sealing. If they don't seal you can add the relish in with the next batch recook and try to process again, or you can put that jar in the fridge and eat in the near future. 

  • Leave the jars to cool 
  • You will need to wash off the jars after they are completely cool. Mineral deposits from your water can leave a film on your jars making them look cloudy. 


"We are indeed much more than what we
eatbut what we eat can nevertheless help 
us to be much more than what we are."
Adelle Davis


Wednesday, July 11, 2012

Cauliflower Crust Pizza

Okay, so at first I thought yuck! How does that work or worse...taste!?! I first saw this recipe in a gluten free cookbook, but I didn't get the guts to try it till I saw a friend of mine post how amazing it was.

Ingredients you will need.

1 head of cauliflower
1/4 cup of cheese (your choice of kind)
2 eggs
thyme
oregano
cumin
italian seasoning
1/4 cup red pepper chopped
1/4 cup green pepper chopped
1/4 small onion chopped
pizza sauce or tomato paste
ground turkey 

Pre-heat oven to 425'F. 

Using a cheese grater, shred the cauliflower then put it into a microwave safe bowl. Microwave for 8 minutes. Then let it cool for a few minutes. 


Add cheese, eggs, and spices. (I used 1/4 pepperjack cheese in the base and 1/4 shredded colby jack for the final topping) Stir until it starts to hold its shape and is mixed thoroughly. Spread out on a greased cookie sheet or pizza pan. 1/4 inch thick seems to be the perfect depth for the cauliflower crust.  


Bake for 15-20 minutes or until golden brown. While that is baking, brown your meat. It doesn't take much, but it really depends on how much you want to use. 

Obviously we had A LOT of meat left over, but I will freeze it for later. 

Now prepare your other toppings. I love peppers, so we made that the bulk of our pizza. You can add mushrooms, pepperoni, really whatever you want. I kept it simple to ensure that it was GF. 


Once the crust is browned pull from oven and top with sauce, then your other toppings. Spring with oregano and bake for another 5-10 minutes or until cheese is melted. 


Cut and enjoy! 

p.s. it doesn't taste like cauliflower at all!! It is amazing and is a new favorite in the Wagner household. 


Fresh Fruit Smoothie

Whenever I get a sweet tooth, I turn to fruit. It's natural, healthy, and just yummy. Now, let me say, there is too much of a good thing. So moderation is key.

First off, take a cup of milk and pour it into blender. I use skim/or fat free. Adults don't need the extra fat in milk that kids might need, so keep it simple. Soy or almond milk would even be a good choice. Then add your banana and blend it up good. Add your frozen strawberries and blend those as well. I like frozen berries because it gives it an iced texture. Top with a garnish (if desired) and enjoy. :)

1 Cup Milk
1 Banana
1 Cup Frozen Strawberries

Feel free to mix it up and choose different fruit. Blueberries, peaches, grapes, raspberries, anything will work.

Next thing I want to get into, is veggies smoothies. :) Will post soon.

Saturday, July 7, 2012

Gluten Free JalapeƱo Poppers

Here is my recipe for Poppers. As a for-warning. WEAR RUBBER GLOVES when handling hot peppers. It makes your hands burn and leaves the juice on for hours regardless of any amount of washing, and do NOT touch your eyes.

First pick out about 16 larger jalapeƱos. The larger they are the easier they are to scrape out the seeds without mutilating them. Cut them long ways from tip to stem leaving about 1/4 uncut.


Then using the back handle of a soup spoon scrape out the seeds. If you want the poppers to have a kick to them, leave in a few seeds. And I mean one or two.

They pack a mighty big punch and are what holds all the heat. Once they are cut, rinse the peppers thoroughly and lay on a paper towel. Then prep your filling.

Mix in your cream cheese, ranch dressing dry mix, and bacon bits in a bowl. May need to heat up the mix a little bit to make stuffing easier. I used a disposable cake bag, but a zip lock baggie with the end cut would probably work just fine. Done try to use a spoon, it will make a mess. Ones they are stuffed, place on a cookie sheet in the freezer for 15-20 minutes.


 Just long enough to let the insides set up. Do not over freeze, this will break down the cell wall of the peppers. Not freezing them before baking or frying will result in the inside oozing out. Which you do not want. While the poppers are in the freezer, prepare your breading. Put about 2 cups of GF bread crumbs and rice flour in one bowl and 2-3 whisked eggs in another bowl.


Once the peppers are chilled, dip them individually in the eggs, then the crumbs. Repeating till completely coated going back and forth between eggs and crumbs. I did at least two coats of crumbs to ensure that the breading doesn't fall off during baking.


Spray pan and tops of poppers to add to the crispy coat. Heat oven to 350'F and place the poppers back in the freezer till the oven is heated. Then bake for 30 minutes or till completely crispy.

Pull from the oven and enjoy hot, warm, or cold. May want to keep a glass of milk on hand, they can be powerful! But oh so yummy :)


  • 16-18 JalapeƱo Peppers
  • 8 oz of Neufchatel Cheese
  • GF Bacon bits
  • 1/4 cup of ranch dry mix 

Fresh Avocado Guacamole Dip

I am thoroughly enjoying going GF. I am discovering all of these simple new amazing recipes. Today, I discovered avocados. YUM! Also known as an alligator pear. It is so versatile and great on salads, dip, tacos, and even in simple recipes that require a stuffing or sauce.

Just like every other fresh food, the key is knowing how to pick it and prepare it. Choosing an avocado can be tricky, I have been fooled on what I thought was ripe, but was not even close. The method I discovered that works best is to first look for one that is semi smooth, not huge bumps on it. Then gently press on the skin. It should give just a little. Too hard means its not ripe. If its mushy, it is too ripe. If you can see the "meat" moving around when you press on it, it is too soft. I have not yet discovered if color has anything to do with it?


 I bought two avocados today from the grocery store. One was absolutely perfect, the other was almost ripe. So I stuck it in a brown paper bag to sit for a day to soften some more. Looking forward to tossing it up into a guacamole dip tomorrow.


After you select the perfect avocado(s) take a sharp butcher knife and cut the avocado in half moving around the seed that is in the center of the fruit. Then twist the two halves to separate.


Then stick the seed with the knife and pull it out. If the fruit is too ripe, the seed will sometimes fall out.

Then with a smaller pairing knife, cut slits in a checkered pattern going the length and width of the fruit.

Then take a spoon and scoop out the insides. If it is not ripe enough it will be hard to cut and scoop, if this happens, put in a baggie and let it sit. Sprinkle lemon juice on the meat to keep it from browning.


Mash up the chunks then add the seasonings, and enjoy! 


Recipe for guacamole dip.

  • 2 ripe avocados
  • 1/2 red onion, minced (about 1/2 cup)
  • 1-2 serrano chiles, stems and seeds removed, minced
  • 2 tablespoons cilantro leaves, finely chopped
  • 1 tablespoon of fresh lime or lemon juice
  • 1/2 teaspoon coarse salt
  • A dash of freshly grated black pepper
  • 1/2 ripe tomato, seeds and pulp removed, chopped

Today I cheated and used a packet of guacamole seasoning that I had in my pantry. It was GF and did the trick. Quite yummy.

Friday, July 6, 2012

Free Range vs Store Bought

I can definitely say that I have a new found passion for all things fresh. I am still working on finding a local butcher, but after going to the farmers market and buying all our fresh produce I am hooked. My newest find is farm fresh "free range" eggs. :) Also known as "cage free" hen's eggs. They are AMAZING! Wow. Nothing like what you buy in the store. They are much larger, heavier, and even the shells are thicker. From the inside-out they are different than your store bought eggs. Even the yolk is a bright orange. When it comes to fresh eggs, it is a matter of quality over quantity. Caged hens are bred to mass produce. Which shortens their lifespan and can result in weaker, less nutritional eggs. Ever wonder why all store bought eggs look exactly the same? Me too, especially because the fresh ones are all different...makes you think, doesn't it? Commercial eggs that can be bought in the store have a much thinner shell and have a pale yellow yolk. Another signature sign of store bought eggs is their color. They are typically pure white. This is not the typical color you see on fresh eggs. Fresh eggs have a brown or bluish/green hue to them. Some find this strange, but it is just a sign of nature. A sign that nothing was engineered to be uniformly massed produced. They are indeed fresh. 

I was thrilled when a co-worker of mine offered to give me a dozen of his fresh eggs. He has about 6 chickens that he raises to lay eggs. Below are two of the eggs he gave me. One is a speckled brown egg and the other is a light bluish/green. (hard to tell in the picture, even though it looks white)
I absolutely love omelets. I was curious as to how store bought and fresh eggs would compare. So I experimented. The only difference is one i used red peppers and the other I used green. Nothing else was put in the omelet. Each omelet had 2 eggs. 


Grease the pan and let it heat up a bit. Then add the peppers and let them cook for a few minutes. Then add the eggs. Once one side is cooked and you can flip it without it breaking fold in half then let it sit for  a few minutes, letting the inside cook. Slide onto plate and enjoy. 

Two store-bought eggs with green peppers. 
Two farm fresh eggs with red peppers. 


Monday, July 2, 2012

Every Little Bit Counts!

That's right ladies and gents! Down a pant size. After only a month of GF eating I am down a size. :) YAY!

I am starting an exercise routine back up called TTap. It is an intense 15 minute workout a day. 15! Minutes! That's it! :) Let me tell ya it works.  The first stage is 14 days straight. Which is the hardest part to do. You definitely get sore but it is worth it. After that you go every other day. So starting today I am doing the 14 days. Hopefully it will help with toning as I lose weight.

Yesterday was awesome, busy day, but fun. We made Ham, green beans and potatoes for lunch/dinner. It was delicious and SUPER! EASY!

Coat the bottom of a large pot with a little bit of oil and heat on low/med heat. Slice 1/2 of a medium sized onion and add to pot. Then add three slices of bacon and cook till browned and crispy. While those simmer cut your ham into small dices and add those to the pot. By adding them before the water they will get a nice brown coat on the sides.

Once the ham is slightly browned add 8 cups of water and turn the heat up to high. Then take your red potatoes cut into fourths and add them to the pot as well. Then add the green beans. I used fresh green beans which required snapping the ends off.

Cook them until the potatoes are soft and cooked through. Then enjoy!

You can freeze the broth to use later as a base, since GF broth is hard to come by...and expensive.

I had left over ham and green beans that I put into food saver bags to freeze. If you are eating fresh fruits and vegetables a food saver is a life saver. It is so easy to use and it keeps your food fresh longer.

Saturday, June 30, 2012

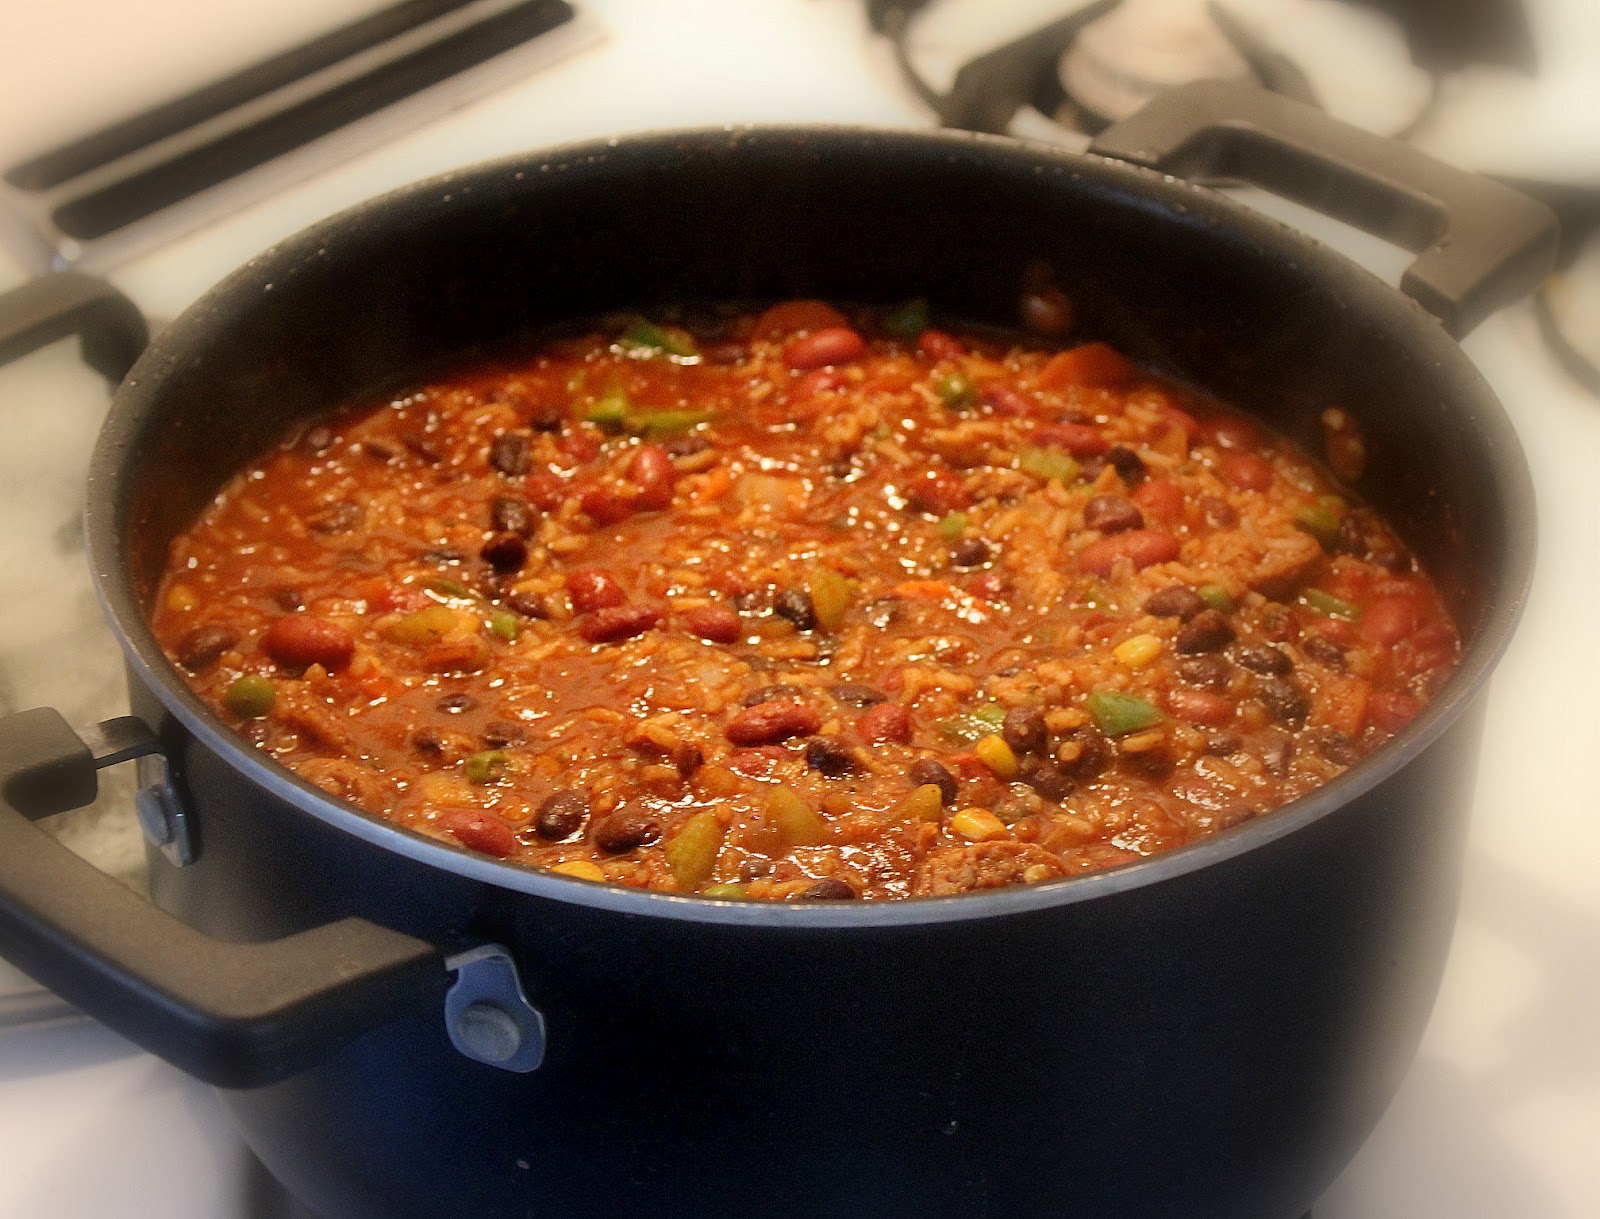
Turkey Vegetable Chili

What do you do with all of the left overs from last week that need to be eaten quick or they will go to waste? Make chili! With eating fresh, sometimes it is difficult to use up all of your fresh food from the week. So, we have Saturday Chili Day. After going to the farmers market, we whipped up some amazing home-made chili.

First start off with a meat. We had hot turkey sausage we needed to use up. Brown your meat in a skillet while you prepare the other ingredients for your chili.

I used one jar of Ragu tomato sauce, just be sure to read the ingredients if you are aiming for gluten free. Ingredients can change without the public even noticing so just because it was okay last time, doesn't mean it will be this time. Pour the tomato sauce into a large pot after turning the burner on low-medium heat. Then use the empty Ragu jar and fill it with completely with water adding that into your pot. I did that twice. Then add two cans of red kidney beans and 2 cans of black beans. If you have chili beans you can use those. Again, read the ingredients on anything canned. It may not be gluten free. Modified food starch is one that can be in beans that you want to avoid. Then add 1/4 cup of Chili Powder. Mix that in well. 1 tbsp of roasted red pepper flakes, and 2 tsp of garlic powder or chopped garlic cloves if you have those. I add cinnamon to our chili to make it a little sweeter.

We had a lot of veggies we needed to use up, so in to the pot it went. We added carrots, celery, onions, and rice to our pot. Yum! Mix everything in well, making sure it doesn't stick to the bottom of the pan. Let the chili simmer till the carrots and rice is cooked through and soft. Once the meat is cooked add it to the pot. Makes for a quick and yummy chili. :) Of course you can adjust this to your likes and for the specific ingredients in your fridge.


Thursday, June 28, 2012

Winging it with Chicken

I love cooking! I can't say I am very good at it. Most things just happen by accident, and I am notorious for "winging it" when it comes to recipes. Cooking is always exciting and can bring such a great sense of accomplishment when you start something new and it turns out magnificently. Last night was one of those nights. Baked whole chicken, Yes Please!

The most difficult thing about baking a whole chicken, is making sure it is thawed. Which can take quite some time. If you are wanting to speed things up, fill up the sink with cooler water and place the chicken in the sink. Or you can just let the water run over the chicken. It took about 2 hours in the sink for my chicken to thaw.

First thing, preheat oven to 375' F.

Once the chicken is thawed, add 2 tbsp of lemon juice, 1/4 cup of water and 1/4 cup of olive oil in a bowl. Gently mix in parsley, thyme, italian seasoning, and roasted red pepper flakes, be generous with the spices. It will give your chicken GREAT flavor. Feel free to add any other seasoning you would like. Pour the mix over the top and bottom of chicken and rub it over the whole chicken. Being sure to coat the wings and legs. I stuffed the inside of the chicken with 1/4 chopped green pepper and half a small onion sliced. If your chicken has a pop-up timer, make sure the pop-up timer is in clear view when you place your chicken in the pan.

After the chicken is seasoned and placed in a deep pan, dice up red potatoes and fresh carrots. Place the potatoes and carrots around the chicken in the bottom of the pan and sprinkle with thyme.

Put on middle rack in preheated oven. Set timer for 2 Hours. If your chicken has a pop-up timer that will make cooking it fully, much easier. When in doubt, check the temperature with a meat thermometer. It should read 180'F.

                      This is on my to-buy list, I can never remember what temperature I need to reach


The key to getting that crispy skin is basting. Periodically throughout the 2 hours. Pull the chicken out of the oven and use a turkey baster or spoon to scoop up the liquid and run it over the top of the chicken. I did this about every 30 minutes. The chicken will produce its own juices which can be later used as gravy or cooking other projects.

When the pop-up timer pops up, turn the oven up to 425'F and cook for another 10 minutes to really get the skin crispy.

This was by far the best chicken I have ever made! I could eat chicken daily and never get sick of it. For the first time baking a whole chicken, it turned out fantastically.

The only thing I would do differently next time, is add way more carrots. The flavor of everything plus the carrots was awesome.


P.S. Yes...this meal was completely GF!

A huge thanks to my friend Cara on this one! She offered some great tips and guidance in making this chicken amazing! Check out her blog! http://twogoldenspoons.blogspot.com/