Showing posts with label gluten free. Show all posts

Sunday, February 17, 2013

Sweet and Sour Chicken

Perfection. Thats all I have to say. This recipe is so easy and yummy! Far better than any chinese restaurant and there aren't all those nasty preservatives and heavens knows what else in it!

Preheat Oven to 350'F


Chicken

3-5 chicken breast or 6-8 Chicken Tenders
salt and pepper
1 cup cornstarch (or enough to coat the chicken) 
2 eggs, beaten
2 tbsp oil


Veggies and Pineapple

1/4 of green pepper sliced
1/4 of yellow pepper sliced
1/4 of red pepper sliced
1/4 onion sliced
1 can of pineapple chunks


Sauce:

1 cup brown sugar
4 Tablespoons ketchup
1/2 cup apple cider vinegar
1 Tablespoon soy sauce
1 teaspoon garlic powder
1 teaspoon ginger
red pepper flakes
1 tablespoon cornstarch 

Directions:

Thaw out your chicken and trim off fat and "weird" pieces. Cut into 1 inch squares

In a bowl beat the two eggs till smooth

In a large zip lock bag, put in 1 cup of cornstarch salt and pepper.

Dip your chicken pieces in the egg then place in zip lock bag. 

Twist up the top of the bag...or seal it...and shake shake shake. I kinda had to massage the pieces of chicken while in the bag to get them coated well. 

Heat up oil in skillet and dump your chicken onto the skillet. Cook until outsides are golden brown. 
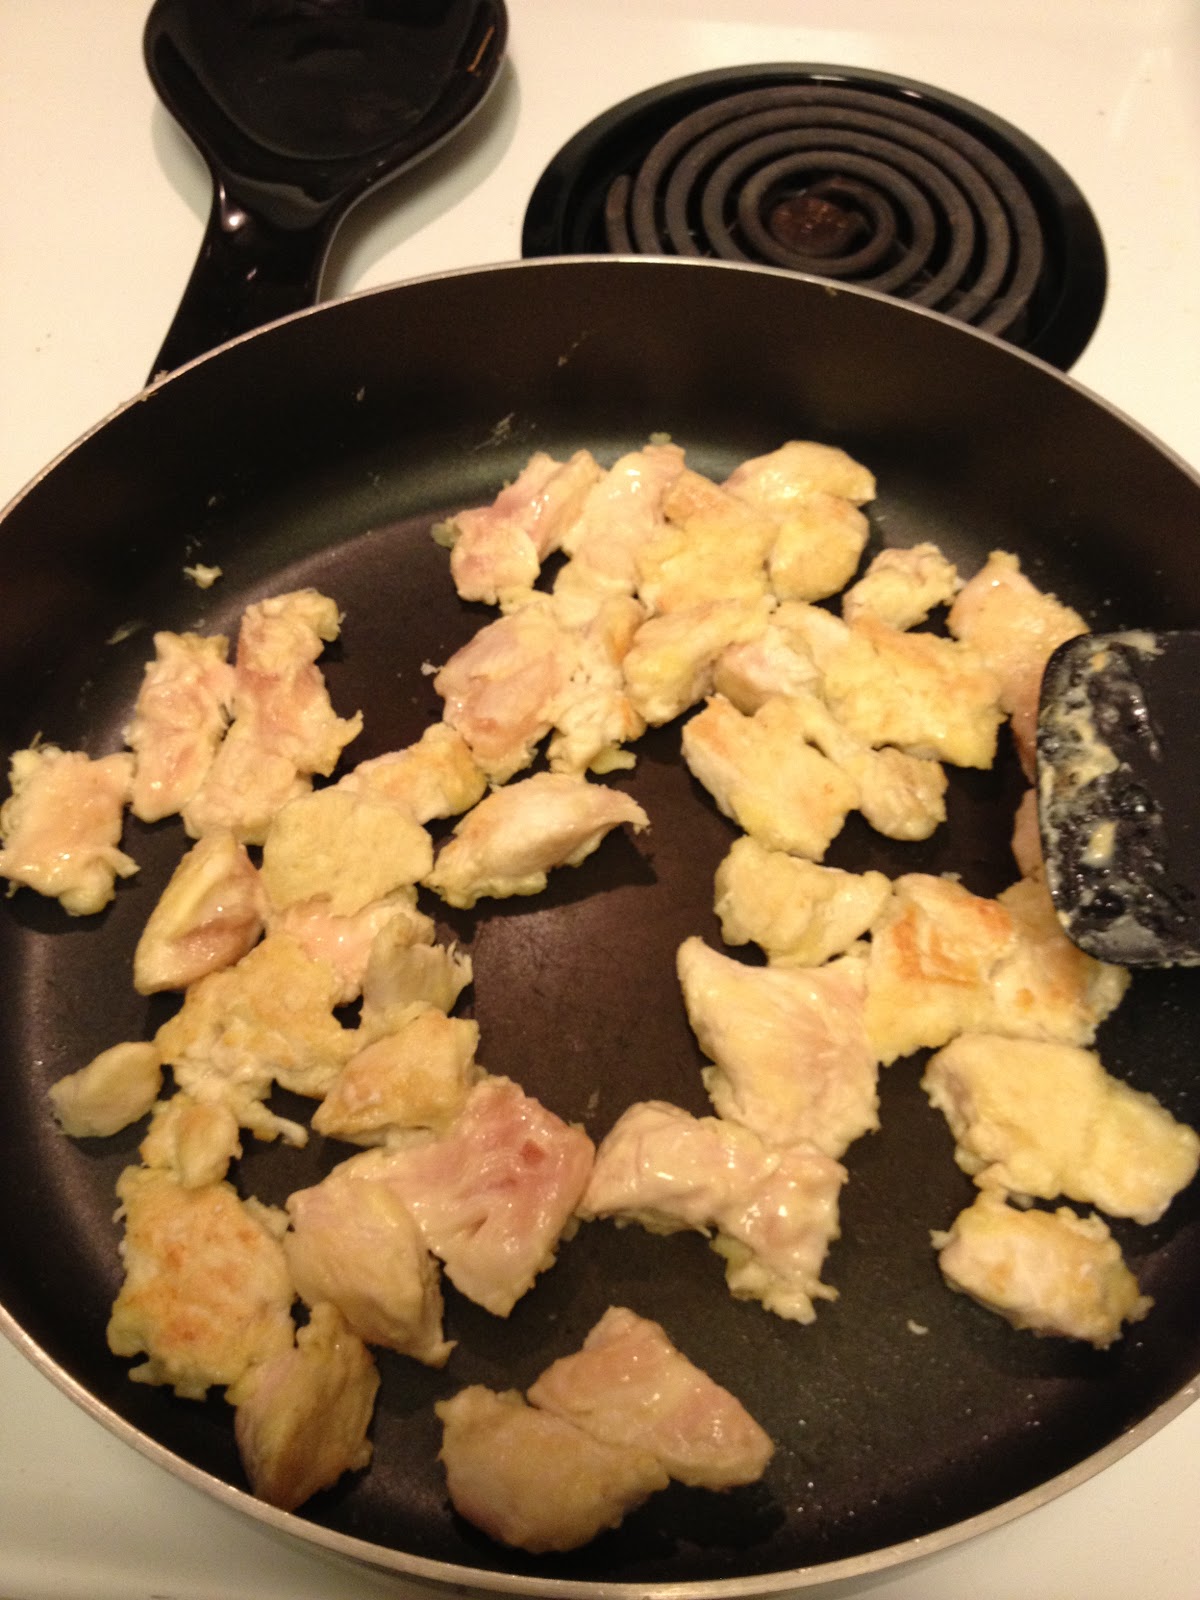


Place Chicken in baking dish. 


Adding a little more oil if needed, cook peppers, onion, and pineapple till tender and pineapple is browned slightly 


While that is cooking prepare your sauce


Whisk all ingredients until smooth then pour over chicken


Once the veggies are cooked add them to the baking dish, stirring them into the sauce. 
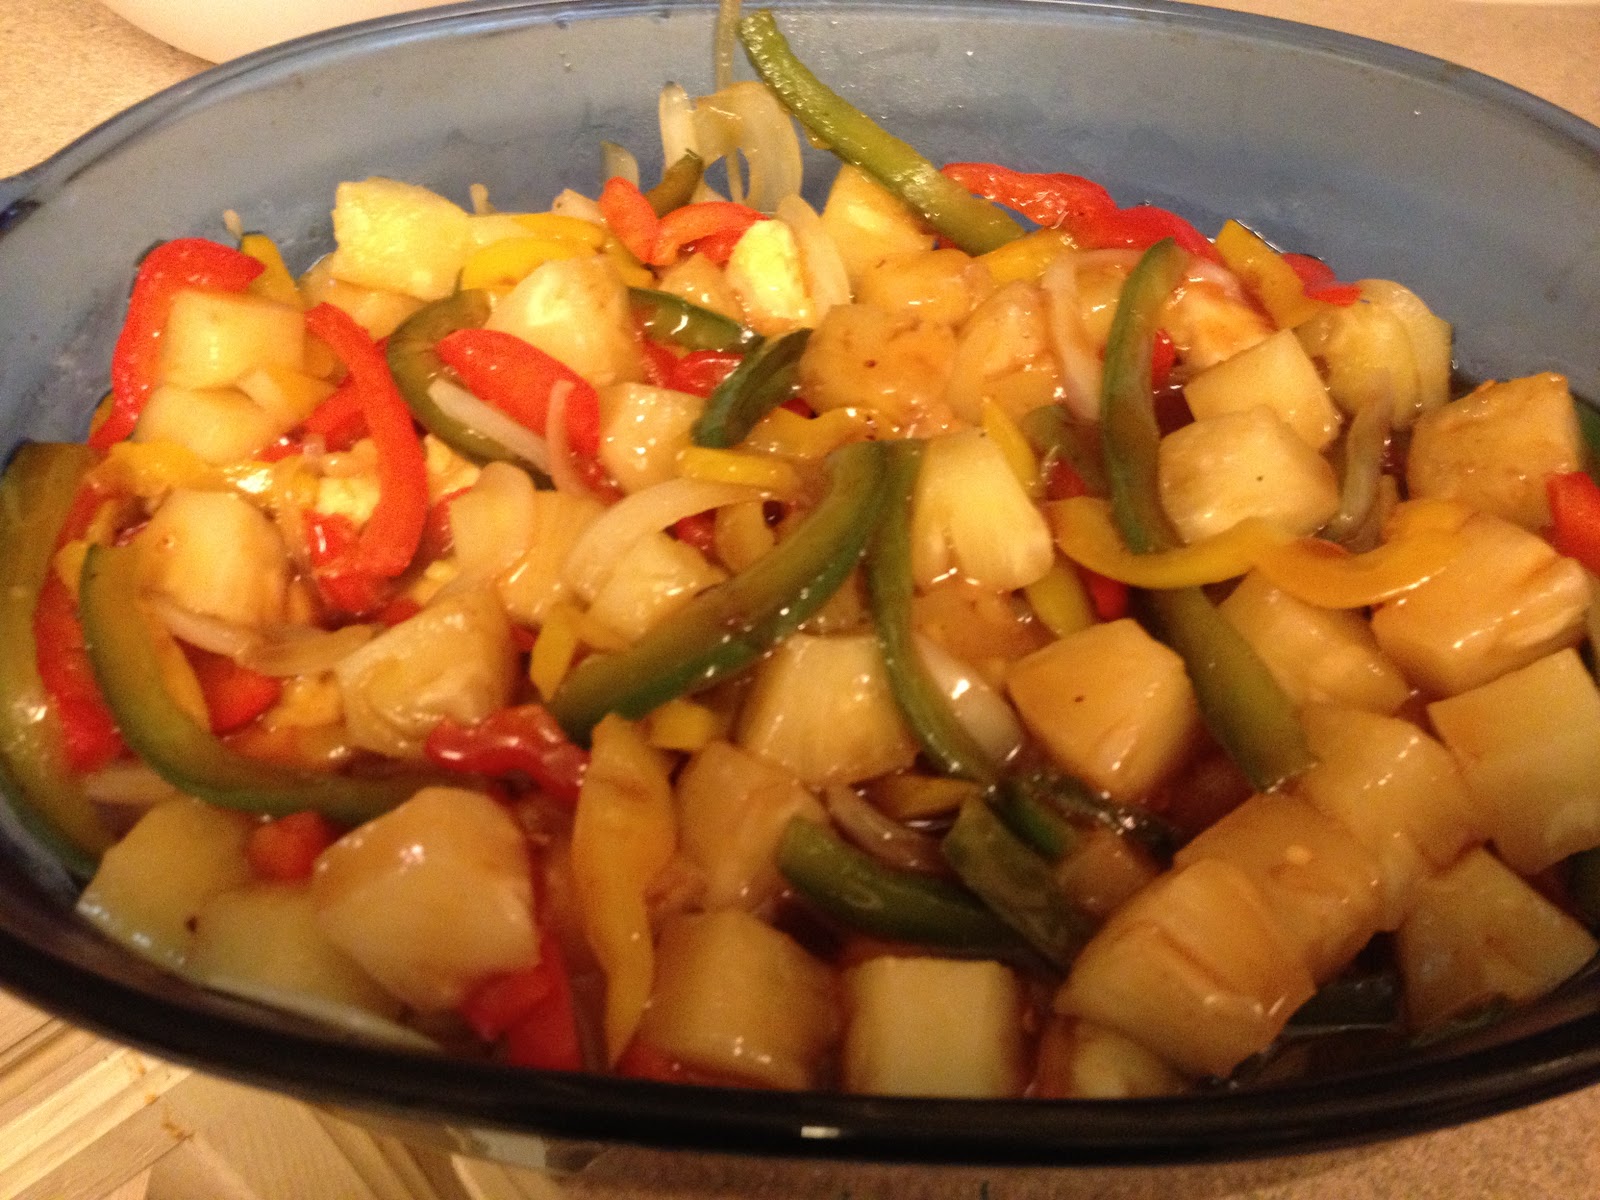


Bake at 350'F for 15 minutes. Stir then bake for another 15 minutes till sauce is thickened.


Serve with rice or any of your other favorite stir fry veggies. 


You will not be disappointed! This recipe is awesome! 


Thursday, February 14, 2013

Cornflake Crusted Chicken (Gluten Free)

Going gluten free has been one of the best decisions I have made for my health. It really isn't that hard once you put your mind to it. Some say, "Oh I just don't know how you do it!" I suggest quitting cold turkey. There is no easy way to say goodbye to little debbie, subway and all those horribly wonderful fried foods. Just walking away and not looking back is the only way to really do it. I have been gluten free for almost 10 months! Haven't cheated once, sadly though, cross contamination happens whether you want it to or not. The best thing about going GF, is you are forced to be creative. You can no longer just order pizza cause you are too lazy to cook dinner, and while yes, McDonalds is still an option, why would I go pay 6 dollars for a salad I can make at home? Cause thats really all you can get when it comes to fast food. So YAY for being creative. This recipe was so good, I'm making it two nights in a row. Which really doesn't happen often. It gives you the texture of those wonderful fried chicken fingers, but doesn't require any frying or flour. It doesn't get easier than this. So here we go:

Ingredients

4 boneless skinless chicken breasts (6 boneless skinless chicken tenders)
3 cups cornflakes (gently smashed so the flakes aren't so big)
2 tablespoons melted butter
1 large egg
1tsp water
Salt
Pepper
Poultry Seasoning or Cajun Spice

Preheat Oven to 400'F

Line a baking sheet with foil (I DEFINITELY recommend this. Makes clean up so much easier!)

Directions


  • Pat salt, pepper, and poultry seasoning of your choice onto both sides of chicken (I used cajun spice and montreal chicken spice to give ours a kick)
  • Mix egg and water in a bowl
  • Mix melted butter and cornflakes in separate medium sized bowl
  • Dip chicken into egg bowl coating both sides well
  • Then dip egged chicken into cornflakes being sure to fully coat the entire piece
  • Place on foil lined baking sheet
  • Once all pieces are coated and on baking sheet, put some more flakes on the top of the pieces just to make sure they had a good coat. (toss out leftover cornflake mixture) You shouldn't have very much leftover though. 
  • Then if you are crazy like we are, sprinkle red pepper flakes over the top of the pieces to make them even a little spicier :) Of course you don't have to use any spicy toppings. It would be just as good with just salt and pepper and a poultry seasoning. 
  • Place in preheated oven for 30 minutes or until done. 
Now, if your man, or yourself, is anything like my hubby... food is always dunked in some sort of sauce. BBQ, Ketchup, Mustard, Ranch...its rare a meal is eaten by him without some sort of dip. So I got creative for him. :) 

I did this by taste, so I really have no clue on measurements...but here is a guess.

Spicy Ranch Dip

1/2 cup ranch dressing
3 tablespoons of chili seasoning
1 tsp garlic powder
pinch of salt
Red pepper flakes to taste

Honey Mustard Dip

1/2 cup mayonase
2 tablespoons mustard
2 tablespoons honey
1/2 tablespoon lemon juice

ENJOY


Wednesday, July 18, 2012

Fried GF Pickles

Fried pickles, oh yes I did it. :) Some think gross, others its pure heavenly bliss in your mouth. Whatever your opinion is on them, these were simply amazing. I couldn't make them fast enough! The first couple tries I just couldn't get it right, I either burnt them or they weren't done. So third times the charm. :)

By now, you can probably assume that all of my meals are GF. Regardless of what the title is. I must say I am getting pretty good about finding substitute recipes for all those wheat filled recipes. 

The first attempt was with pickle spears. That didn't work at all. So I sliced up large pickles super thin which seemed to do the trick. 

First step. Get a deep pan/skillet put enough oil in them so the pickle slices can float. I used about two cups of coconut oil. Adjust depending on what kind of pan you are using. 

Get one bowl for your eggs, water, and lemon juice, mix really well. Then another bowl for your crumbs, spices and flour mix well. 


One Egg
3 TBSP Water
1 TBSP Lemon Juice (optional)

1 Cup Flour
1/2 Cup GF Bread Crumbs
Sprinkle in Red Pepper Flakes or any other seasoning you would like to add to them. 


We had a huge jar of the large whole pickles.  Slice two pickles super thin then toss them in the egg mix bowl. I just let them sit there while I was heating the oil. Once the oil is up to temperature you can start frying them. (My oil was a little over 300'F) . Do the slices one at a time or they will stick to each other in the flower mix. Then drop them in the oil, making sure they aren't sticking to each other. I had about 7 in the pan at a time. Once those were done, I would add more. They will get a golden brown and a little puffy. 


Use a slotted spatula to fish them out of the oil and put them on a paper towel to drip dry. Then enjoy! 

You could easily use pickles that are already sliced in a jar, dill, sweet, whatever sounds good to you. We just used what we had on hand. :) 

Now some of you may be thinking, FRIED! PICKLES! UNHEALTHY! AHHH!  Well, yes they are fried and pickles have lots of salt and No I wouldn't recommend eating them daily, but hey, who says you can't have a fried pickle every now and again? By using coconut oil and GF ingredients it cuts down on the fatty unhealthy quality that you would find at the fair. So no, I am not fixing a decadent salad here, I am simply enjoying some homemade Gluten Free fried pickles :) 

Wednesday, July 11, 2012

Cauliflower Crust Pizza

Okay, so at first I thought yuck! How does that work or worse...taste!?! I first saw this recipe in a gluten free cookbook, but I didn't get the guts to try it till I saw a friend of mine post how amazing it was.

Ingredients you will need.

1 head of cauliflower
1/4 cup of cheese (your choice of kind)
2 eggs
thyme
oregano
cumin
italian seasoning
1/4 cup red pepper chopped
1/4 cup green pepper chopped
1/4 small onion chopped
pizza sauce or tomato paste
ground turkey 

Pre-heat oven to 425'F. 

Using a cheese grater, shred the cauliflower then put it into a microwave safe bowl. Microwave for 8 minutes. Then let it cool for a few minutes. 


Add cheese, eggs, and spices. (I used 1/4 pepperjack cheese in the base and 1/4 shredded colby jack for the final topping) Stir until it starts to hold its shape and is mixed thoroughly. Spread out on a greased cookie sheet or pizza pan. 1/4 inch thick seems to be the perfect depth for the cauliflower crust.  


Bake for 15-20 minutes or until golden brown. While that is baking, brown your meat. It doesn't take much, but it really depends on how much you want to use. 

Obviously we had A LOT of meat left over, but I will freeze it for later. 

Now prepare your other toppings. I love peppers, so we made that the bulk of our pizza. You can add mushrooms, pepperoni, really whatever you want. I kept it simple to ensure that it was GF. 


Once the crust is browned pull from oven and top with sauce, then your other toppings. Spring with oregano and bake for another 5-10 minutes or until cheese is melted. 


Cut and enjoy! 

p.s. it doesn't taste like cauliflower at all!! It is amazing and is a new favorite in the Wagner household. 


Fresh Fruit Smoothie

Whenever I get a sweet tooth, I turn to fruit. It's natural, healthy, and just yummy. Now, let me say, there is too much of a good thing. So moderation is key.

First off, take a cup of milk and pour it into blender. I use skim/or fat free. Adults don't need the extra fat in milk that kids might need, so keep it simple. Soy or almond milk would even be a good choice. Then add your banana and blend it up good. Add your frozen strawberries and blend those as well. I like frozen berries because it gives it an iced texture. Top with a garnish (if desired) and enjoy. :)

1 Cup Milk
1 Banana
1 Cup Frozen Strawberries

Feel free to mix it up and choose different fruit. Blueberries, peaches, grapes, raspberries, anything will work.

Next thing I want to get into, is veggies smoothies. :) Will post soon.

Saturday, July 7, 2012

Gluten Free Jalapeño Poppers

Here is my recipe for Poppers. As a for-warning. WEAR RUBBER GLOVES when handling hot peppers. It makes your hands burn and leaves the juice on for hours regardless of any amount of washing, and do NOT touch your eyes.

First pick out about 16 larger jalapeños. The larger they are the easier they are to scrape out the seeds without mutilating them. Cut them long ways from tip to stem leaving about 1/4 uncut.


Then using the back handle of a soup spoon scrape out the seeds. If you want the poppers to have a kick to them, leave in a few seeds. And I mean one or two.

They pack a mighty big punch and are what holds all the heat. Once they are cut, rinse the peppers thoroughly and lay on a paper towel. Then prep your filling.

Mix in your cream cheese, ranch dressing dry mix, and bacon bits in a bowl. May need to heat up the mix a little bit to make stuffing easier. I used a disposable cake bag, but a zip lock baggie with the end cut would probably work just fine. Done try to use a spoon, it will make a mess. Ones they are stuffed, place on a cookie sheet in the freezer for 15-20 minutes.


 Just long enough to let the insides set up. Do not over freeze, this will break down the cell wall of the peppers. Not freezing them before baking or frying will result in the inside oozing out. Which you do not want. While the poppers are in the freezer, prepare your breading. Put about 2 cups of GF bread crumbs and rice flour in one bowl and 2-3 whisked eggs in another bowl.


Once the peppers are chilled, dip them individually in the eggs, then the crumbs. Repeating till completely coated going back and forth between eggs and crumbs. I did at least two coats of crumbs to ensure that the breading doesn't fall off during baking.


Spray pan and tops of poppers to add to the crispy coat. Heat oven to 350'F and place the poppers back in the freezer till the oven is heated. Then bake for 30 minutes or till completely crispy.

Pull from the oven and enjoy hot, warm, or cold. May want to keep a glass of milk on hand, they can be powerful! But oh so yummy :)


  • 16-18 Jalapeño Peppers
  • 8 oz of Neufchatel Cheese
  • GF Bacon bits
  • 1/4 cup of ranch dry mix 

Fresh Avocado Guacamole Dip

I am thoroughly enjoying going GF. I am discovering all of these simple new amazing recipes. Today, I discovered avocados. YUM! Also known as an alligator pear. It is so versatile and great on salads, dip, tacos, and even in simple recipes that require a stuffing or sauce.

Just like every other fresh food, the key is knowing how to pick it and prepare it. Choosing an avocado can be tricky, I have been fooled on what I thought was ripe, but was not even close. The method I discovered that works best is to first look for one that is semi smooth, not huge bumps on it. Then gently press on the skin. It should give just a little. Too hard means its not ripe. If its mushy, it is too ripe. If you can see the "meat" moving around when you press on it, it is too soft. I have not yet discovered if color has anything to do with it?


 I bought two avocados today from the grocery store. One was absolutely perfect, the other was almost ripe. So I stuck it in a brown paper bag to sit for a day to soften some more. Looking forward to tossing it up into a guacamole dip tomorrow.


After you select the perfect avocado(s) take a sharp butcher knife and cut the avocado in half moving around the seed that is in the center of the fruit. Then twist the two halves to separate.


Then stick the seed with the knife and pull it out. If the fruit is too ripe, the seed will sometimes fall out.

Then with a smaller pairing knife, cut slits in a checkered pattern going the length and width of the fruit.

Then take a spoon and scoop out the insides. If it is not ripe enough it will be hard to cut and scoop, if this happens, put in a baggie and let it sit. Sprinkle lemon juice on the meat to keep it from browning.


Mash up the chunks then add the seasonings, and enjoy! 


Recipe for guacamole dip.

  • 2 ripe avocados
  • 1/2 red onion, minced (about 1/2 cup)
  • 1-2 serrano chiles, stems and seeds removed, minced
  • 2 tablespoons cilantro leaves, finely chopped
  • 1 tablespoon of fresh lime or lemon juice
  • 1/2 teaspoon coarse salt
  • A dash of freshly grated black pepper
  • 1/2 ripe tomato, seeds and pulp removed, chopped

Today I cheated and used a packet of guacamole seasoning that I had in my pantry. It was GF and did the trick. Quite yummy.

Friday, July 6, 2012

Free Range vs Store Bought

I can definitely say that I have a new found passion for all things fresh. I am still working on finding a local butcher, but after going to the farmers market and buying all our fresh produce I am hooked. My newest find is farm fresh "free range" eggs. :) Also known as "cage free" hen's eggs. They are AMAZING! Wow. Nothing like what you buy in the store. They are much larger, heavier, and even the shells are thicker. From the inside-out they are different than your store bought eggs. Even the yolk is a bright orange. When it comes to fresh eggs, it is a matter of quality over quantity. Caged hens are bred to mass produce. Which shortens their lifespan and can result in weaker, less nutritional eggs. Ever wonder why all store bought eggs look exactly the same? Me too, especially because the fresh ones are all different...makes you think, doesn't it? Commercial eggs that can be bought in the store have a much thinner shell and have a pale yellow yolk. Another signature sign of store bought eggs is their color. They are typically pure white. This is not the typical color you see on fresh eggs. Fresh eggs have a brown or bluish/green hue to them. Some find this strange, but it is just a sign of nature. A sign that nothing was engineered to be uniformly massed produced. They are indeed fresh. 

I was thrilled when a co-worker of mine offered to give me a dozen of his fresh eggs. He has about 6 chickens that he raises to lay eggs. Below are two of the eggs he gave me. One is a speckled brown egg and the other is a light bluish/green. (hard to tell in the picture, even though it looks white)
I absolutely love omelets. I was curious as to how store bought and fresh eggs would compare. So I experimented. The only difference is one i used red peppers and the other I used green. Nothing else was put in the omelet. Each omelet had 2 eggs. 


Grease the pan and let it heat up a bit. Then add the peppers and let them cook for a few minutes. Then add the eggs. Once one side is cooked and you can flip it without it breaking fold in half then let it sit for  a few minutes, letting the inside cook. Slide onto plate and enjoy. 

Two store-bought eggs with green peppers. 
Two farm fresh eggs with red peppers. 


Tuesday, July 3, 2012

Too Much of a Good Thing

Portion control, portion control, portion control. That is all I have to say. For the past month we have been eating all fresh foods and it has been wonderful. I have seen the weight go down and it is so encouraging, but I know there are still some things I need to improve upon. The fist step is to stop eating when I am comfortable. Do not overstuff yourself with food. Yes Americans seem to "get away" with this quite often where every meal is a king's feast, but it doesn't have to be. Food is for sustenance and nutrition. It is not a hobby. Food should be pleasing to the pallet, but it shouldn't be an emotional bind. The key to any weight loss is self control. Being able to just say no, I don't need that, and walk away. I am pleasantly surprised at how easy it is for me to pass all those baked goodies and processed sweets and not even bat an eye. I know they are bad for me, and will make me feel rotten, so I just avoid them. My downfall now seems to be just saying enough. I am loving all this good food we are making, but again, portion control. Now that doesn't mean say, this meal you can have a cup of this 2 tbsp of this and a tsp of this. That in my mind is a little much. Eat when you are hungry and stop when you are comfortable. Not full. It will also help to cut back on indigestion. So don't overstuff yourself, it isn't necessary.


Overstuffing also leads to getting hungry sooner. You're body realizes that you don't have that "full" feeling and you start munching thinking that you need that feeling back. You don't.
Also, don't wait to eat till you are ravenously hungry. Have munchies on hand to hold you over and keep you comfortable. But that doesn't mean mindlessly snacking all day either.

Second goal is to not eat after 7pm. This gives your food time to digest before you go to bed. Sleeping on a full stomach is not only uncomfortable, but is definitely not the best thing for your intestines.

So whether you are out and about or eating at home, keep in mind that food is to sustain your life, not entertain you. If you need entertainment get out and go for a walk or go to the park, something active. Your body will thank you!


Picture retrieved from http://slenderherbs.com/weight-loss-lose-weight-inspiration/food-is-my-sustenance-not-my-friend/ on July 3, 2012.

Monday, July 2, 2012

Every Little Bit Counts!

That's right ladies and gents! Down a pant size. After only a month of GF eating I am down a size. :) YAY!

I am starting an exercise routine back up called TTap. It is an intense 15 minute workout a day. 15! Minutes! That's it! :) Let me tell ya it works.  The first stage is 14 days straight. Which is the hardest part to do. You definitely get sore but it is worth it. After that you go every other day. So starting today I am doing the 14 days. Hopefully it will help with toning as I lose weight.

Yesterday was awesome, busy day, but fun. We made Ham, green beans and potatoes for lunch/dinner. It was delicious and SUPER! EASY!

Coat the bottom of a large pot with a little bit of oil and heat on low/med heat. Slice 1/2 of a medium sized onion and add to pot. Then add three slices of bacon and cook till browned and crispy. While those simmer cut your ham into small dices and add those to the pot. By adding them before the water they will get a nice brown coat on the sides.

Once the ham is slightly browned add 8 cups of water and turn the heat up to high. Then take your red potatoes cut into fourths and add them to the pot as well. Then add the green beans. I used fresh green beans which required snapping the ends off.

Cook them until the potatoes are soft and cooked through. Then enjoy!

You can freeze the broth to use later as a base, since GF broth is hard to come by...and expensive.

I had left over ham and green beans that I put into food saver bags to freeze. If you are eating fresh fruits and vegetables a food saver is a life saver. It is so easy to use and it keeps your food fresh longer.

Saturday, June 30, 2012

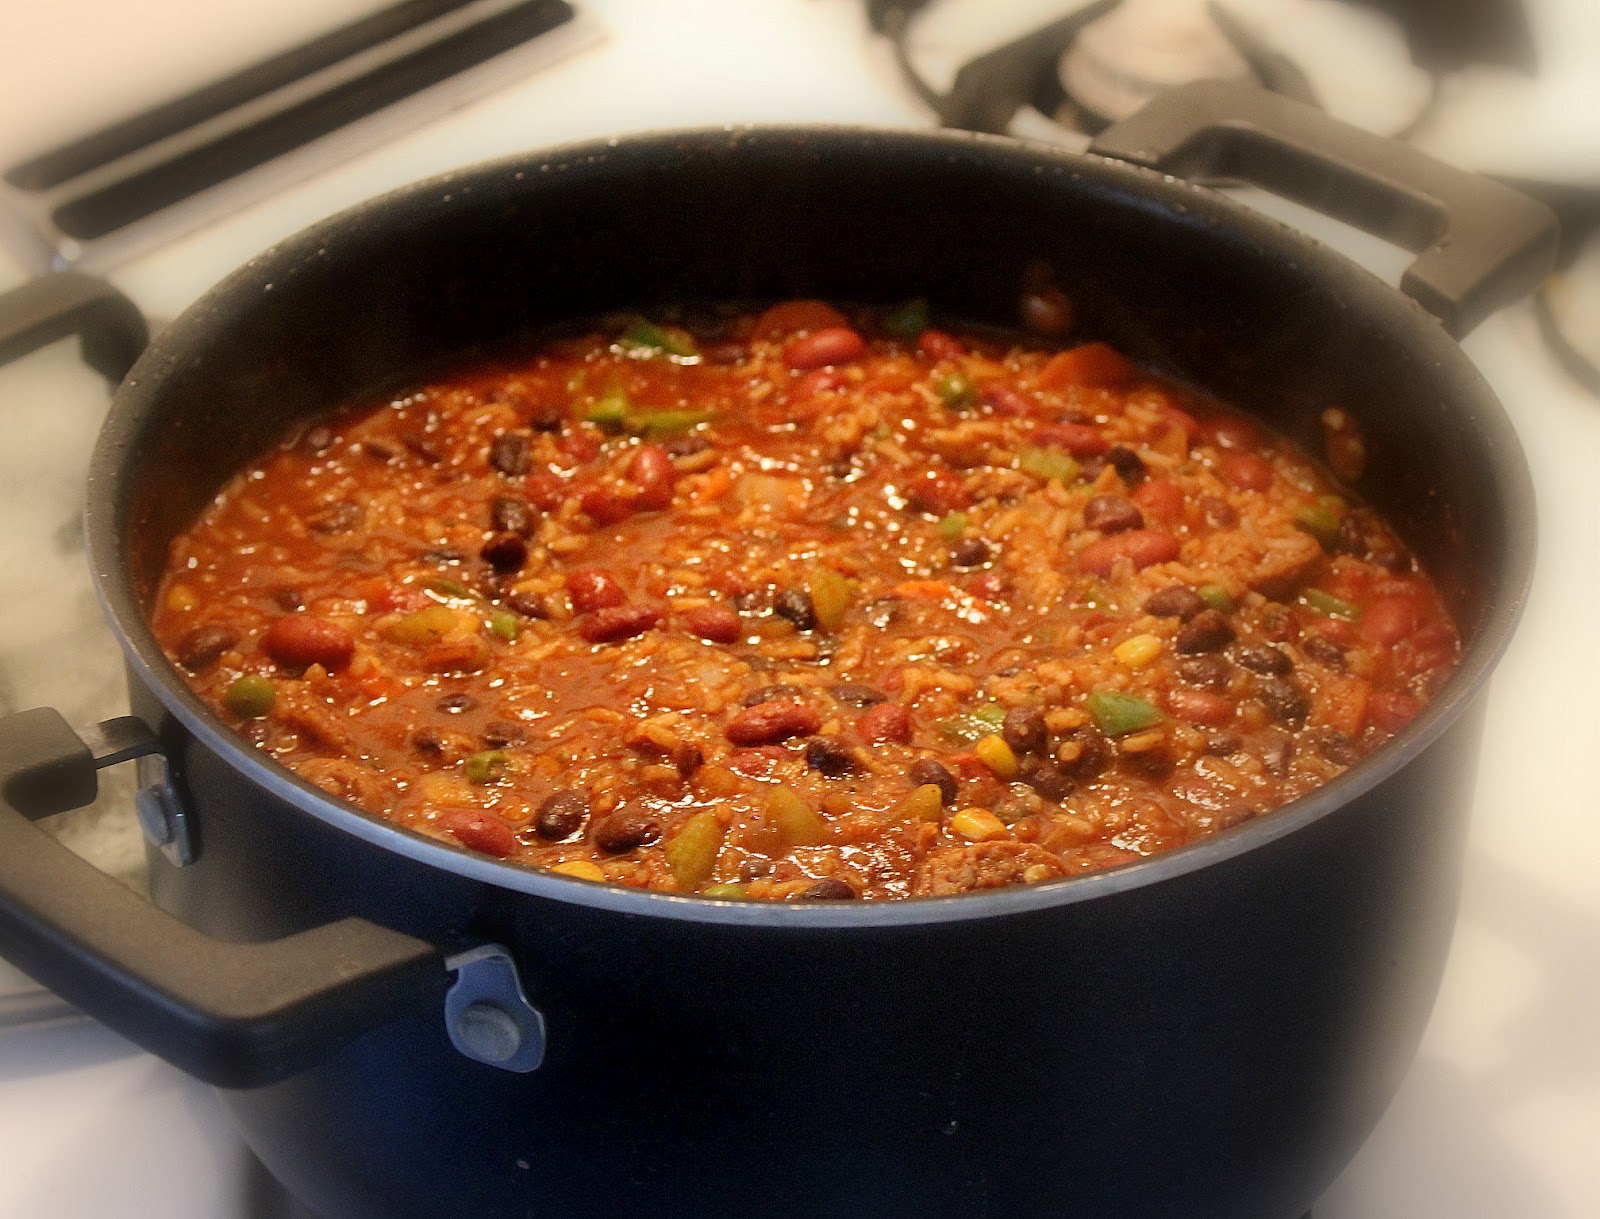
Turkey Vegetable Chili

What do you do with all of the left overs from last week that need to be eaten quick or they will go to waste? Make chili! With eating fresh, sometimes it is difficult to use up all of your fresh food from the week. So, we have Saturday Chili Day. After going to the farmers market, we whipped up some amazing home-made chili.

First start off with a meat. We had hot turkey sausage we needed to use up. Brown your meat in a skillet while you prepare the other ingredients for your chili.

I used one jar of Ragu tomato sauce, just be sure to read the ingredients if you are aiming for gluten free. Ingredients can change without the public even noticing so just because it was okay last time, doesn't mean it will be this time. Pour the tomato sauce into a large pot after turning the burner on low-medium heat. Then use the empty Ragu jar and fill it with completely with water adding that into your pot. I did that twice. Then add two cans of red kidney beans and 2 cans of black beans. If you have chili beans you can use those. Again, read the ingredients on anything canned. It may not be gluten free. Modified food starch is one that can be in beans that you want to avoid. Then add 1/4 cup of Chili Powder. Mix that in well. 1 tbsp of roasted red pepper flakes, and 2 tsp of garlic powder or chopped garlic cloves if you have those. I add cinnamon to our chili to make it a little sweeter.

We had a lot of veggies we needed to use up, so in to the pot it went. We added carrots, celery, onions, and rice to our pot. Yum! Mix everything in well, making sure it doesn't stick to the bottom of the pan. Let the chili simmer till the carrots and rice is cooked through and soft. Once the meat is cooked add it to the pot. Makes for a quick and yummy chili. :) Of course you can adjust this to your likes and for the specific ingredients in your fridge.


Farm Fresh

With a gluten sensitivity comes the need to eat lots of fresh fruits and vegetables. The only problem with this, is buying fresh can be expensive. Unless you have the time and dedication to grow your own garden, shopping fresh can seem like a hassle when you are not "used" to it. It's not liking going to Aldi and buying dollar bags of chips and ho-ho's. The best way to keep that grocery bill down is to shop for produce that is in season. There is nothing wrong with buying produce out of season, it doesn't make it any less healthy or delicious. But it will make your budget happy.

Our finds today! Love eating fresh! Cherries, red potatoes, bananas, apples, raspberries, celery, onions.

This is why I have a new found love for our local farmers market. I love walking through the isles of venders taking in all the hustle and bustle of everyone looking for the freshest organic produce. What a rush! The trick to getting the best deal for the freshest produce is to know what season is best for certain fruits and veggies. Also, knowing which vendors will cut deals and bargain a bit. For instance, rather than spending two dollars for one quart of potatoes, you get three quarts for five dollars. DEALS! The farmers market is a lifesaver for people like me who have absolutely no green thumb to speak of.


Black Raspberries 


Again, it's all about the seasons. Sometimes it is obvious of what is season because you will see every vendor with it at their booth, but sometimes it is harder to tell if you are getting a good deal or not.


January


February


March


April
Asparagus
Avocados
Beets
Broccoli
Cabbage
Carambola
Cauliflower
Celery
Chard
Cherimoyas
Citrus:
  Blood Orange,
  Grapefruit,
  Kumquats,
  Lemons,
  Navel Oranges,
  Tangelos/Tangerines 
Dates, Medjool
Kale
Kohlrabi
Mushroom
Mustard
Onion, Green
Passion Fruit
Peas, Green
Strawberries
Asparagus
Avocados
Beets
Broccoli
Brussels Sprouts
Cabbage
Carrots
Cauliflower
Celery
Chard
Citrus:
Blood Orange,
Grapefruit,
Kumquats,
Lemons,
Navel Oranges, 
Tangelos/Tangerines 
Collards
Dates, Medjool
Kale
Kohlrabi
Lettuce
Mushroom
Mustard
Onion, Green
Passion Fruit
Peas, Green
Spinach
Strawberries
Turnips
Asparagus
Avocados
Beets
Broccoli
Cabbage
Carrots
Cauliflower
Celery
Chard
Citrus:
  Blood Oranges,
  Grapefruits,
  Kumquats,
  Lemons,
  Navel Oranges,
  Tangelos/Tangerines
Collards
Dates, Medjool
Kale
Kohlrabi
Lettuce
Mushroom
Mustard
Onion, Green
Passion Fruit
Peas, Green
Spinach
Strawberries
Turnips
Asparagus
Avocados
Basil
Beans, Green
Beets
Broccoli
Cabbage
Carrots
Cauliflower
Celery
Chard
Cherries
Citrus:
  Grapefruits,
  Kumquats,
  Lemons,
  Navel Oranges,
  Tangelos/Tangerines 
Collards
Cucumber
Dates, Medjool
Kale
Kohlrabi
Lettuce
Mushroom
Mustard
Nectarines
Onion, Green
Passion Fruit
Peas, Green
Raspberries
Spinach
Strawberries
Tomatoes
Turnips


May


June


July


August
Apricots
Asparagus
Avocados
Basil
Beans, Green
Beets
Broccoli
Cabbage
Carrots
Cauliflower
Celery
Chard
Cherries
Citrus:
  Grapefruits,
  Kumquats,
  Lemons,
  Navel Oranges,
  Valencia Oranges      
Collards
Corn
Cucumber
Dates, Medjool
Eggplant
Figs
Kale
Kohlrabi
Lettuce
Mushroom
Mustard
Nectarines,
Okra
Onion, dry
Onion, Green
Passion Fruit
Peaches
Pears, Asian
Peas, Black-eyed
Peas, Green
Plums
Potatoes
Raspberries
Spinach
Squash, Summer
Strawberries
Tomatoes
Turnips
Apricots
Avocados
Cherries
Asparagus
Basil
Beans, Green
Beets
Broccoli
Cabbage
Carrots
Cauliflower
Celery
Chard
Citrus:
  Grapefruits,
  Kumquats,
  Lemons,
  Navel Oranges,
  Valencia Oranges   
Collards
Corn
Cucumber
Eggplant
Figs
Grapes
Kale
Kohlrabi
Lettuce
Melons
Mushroom
Mustard
Nectarines
Okra
Onion, dry
Onion, Green
Passion Fruit
Peaches
Pears
Pears, Asian
Peas, Black-eyed
Peppers
Plums
Potatoes
Raspberries
Spinach
Squash, Summer
Strawberries
Tomatoes
Turnips
Apples
Apricots
Asparagus
Avocados
Basil
Beans, Green
Beets
Broccoli
Cabbage
Carrots
Cauliflower
Celery
Cherries
Citrus:
  Grapefruits,
  Lemons,
  Valencia Oranges      
Collards
Corn
Cucumber
Eggplant
Figs
Grapes
Kale
Kohlrabi
Lettuce
Melons
Mushroom
Mustard
Nectarines
Okra
Onion, dry
Onion, Green
Passion Fruit
Peaches
Pears
Pears, Asian
Peas, Black-eyed
Peppers
Plums
Potatoes
Raspberries
Sapote
Spinach
Squash, Summer
Strawberries
Tomatoes
Turnips
Apples
Asparagus
Avocados
Basil
Beans, Green
Beets
Broccoli
Cabbage
Carrots
Cauliflower
Celery
Chili Pepper
Citrus:
  Grapefruits,
  Lemons,
  Valencia Oranges    
Collards
Corn
Cucumber
Eggplant
Figs
Grapes
Kale
Kohlrabi
Lettuce
Melons
Mushroom
Mustard
Nectarines
Okra
Onion, dry
Onion, Green
Passion Fruit
Peaches
Pears
Pears, Asian
Peas, Black-eyed
Peppers
Persimmons
Plums
Potatoes
Raspberries
Sapote
Spinach
Squash, Summer
Squash, Winter
Strawberries
Tomatillos
Tomatoes
Turnips


September


October


November


December
Apples
Asparagus
Avocados
Basil
Beans, Green
Beets
Brussels Sprout
Cabbage
Carrots
Celery
Chili Pepper
Citrus:
  Grapefruits,
  Lemons,
  Valencia Oranges     
Oranges
Collards
Corn
Cucumber
Eggplant
Grapes
Guava, Pineapple
Kale
Kohlrabi
Lettuce
Mushroom
Mustard
Nectarines
Okra
Onion, dry
Onion, Green
Passion Fruit
Peaches
Pears
Pears, Asian
Peas, Black-eyed
Peppers
Persimmons
Plums
Potatoes
Raspberries
Sapote
Spinach
Squash, Summer
Squash, Winter
Strawberries
Tomatillos
Tomatoes
Turnips
Apples
Asparagus
Avocados
Basil
Beans, Green
Beets
Broccoli
Brussels Sprout
Cabbage
Carambola
Carrots
Cauliflower
Celery
Chard
Cherimoyas
Chili Pepper
Citrus:
  Grapefruits,
  Lemons,
  Tangelos/Tangerines,
  Valencia Oranges
Collards
Corn
Cucumber
Eggplant
Grapes
Guava, Pineapple
Kale
Kiwi
Kohlrabi
Lettuce
Mushroom
Mustard
Okra
Onion, dry
Onion, Green
Passion Fruit
Peaches
Pears, Asian
Peas, Black-eyed
Peppers
Persimmons
Pomegranates
Potatoes
Raspberries
Sapote
Spinach
Squash, Summer
Squash, Winter
Strawberries
Tomatillos
Tomatoes
Turnips
Yams
Apples
Artichokes
Asparagus
Basil
Beans, Green
Beets
Broccoli
Brussels Sprout
Cabbage
Carambola
Carrots
Cauliflower
Celery
Chard
Cherimoyas
Chili Pepper
Citrus:
  Grapefruits,
  Lemons,
  Tangelos/Tangerines,
  Valencia Oranges
Collards
Corn
Cucumber
Eggplant
Grapes
Guava, Pineapple
Kale
Kiwi
Kohlrabi
Lettuce
Mushroom
Mustard
Okra
Onion, dry
Onion, Green
Passion Fruit
Peaches
Peas, Black-eyed
Peppers
Persimmons
Pomegranates
Potatoes
Raspberries
Sapote
Spinach
Squash, Summer
Squash, Winter
Tomatillos
Tomatoes
Turnips
Yams
Artichokes
Basil
Beans, Green
Beets
Brussels Sprout
Cabbage
Carrots
Cauliflower
Celery
Chard
Chili Pepper
Citrus:
  Lemons,
  Valencia Oranges       
Collards
Corn
Cucumber
Eggplant
Grapes
Guava, Pineapple
Kale
Kiwi
Kohlrabi
Lettuce
Mushroom
Mustard
Okra
Onion, dry
Onion, Green
Peppers
Pomegranates
Potatoes
Spinach
Squash, Summer
Squash, Winter
Tomatillos
Tomatoes
Turnips
Yams

Southland Farmers Markets Association (2002) Retrieved from: http://www.sfma.net/consumer/inseason.shtml/

Red Raspberries