Earlier this month we found out we are having a little girl in June! Im ecstatic! The "nesting" bug has hit me hard. So I set out to make some practical things I can use once little Junebug gets here!
So here we go. Easy Bib for your little one!
I used a plain white terry cloth (basically towel fabric) and 100% cotton flannel. This would be a great project to recycle those old ratty towels that you just don't know what to do with. You could even use old t-shirts instead of the flannel.
BIB
Dimensions (pre-sewing) Dimensions (finished product)
12 inches long (from top of neck loop to bottom of bib) ~ 11 1/2 inches
6 1/2 inches (from bottom of neck loop to bottom of bib) ~ 6 inches
9 in wide (very bottom of bib, the top will be curved) ~ 8 1/2 inches
4 inches (circumference) for the neck hole ~ 4 1/2 inches
Instructions:
Start off with your terry cloth. Fold your cloth in half and trace out the dimensions of the bib with a pen. I had a previous bib to trace or you can use the dimensions above and a ruler to mark off the sides. Folding it in half helps if you are free handing it. Then use your rotary cutter (or scissors) to cut along the pen marks. If its folded in half, be sure not to cut on the fold...or else you will cut your bib in half. :)
When you unfold your bib, it will look like this (below)
Next lay out your flannel or t-shirt material and place your terry cloth on the flannel. It is helpful to have your flannel, right side up so when you cut it, you are immediately ready to pin, and you do not have to re-align it. (in the picture it is wrong side up)
Using a pen, trace around your terry cloth, or if you are brave (or lazy, like me) use your rotary blade to cut around the terry cloth.
Next lay your two pieces right sides together. (meaning the printed side of the fabric will be against the terry cloth)
and Pin Pin Pin!
unless you are brave...or lazy... and decide to free hand it without pinning (not recommended). While pinning, make a mental note, or two pins, where you will stop sewing, leaving a hole. This way you can flip it right side out.
Then cut a single slit to divide the two neck straps.
Simply sew around the edges leaving a 1/4 in seem, and the hole.
Once you flip it right side out it will look like this (below). If you have trouble getting the neck straps to flip inside out, a pen is handy.
Then, using a zig zag stitch, sew around the entire bib, sealing up the hole and helping the fabric to lay flat.
Finished Front
Finished Back
Then the final step is to add either velcro or snaps to the neck. Which I have yet to do... I plan to add a few snaps to the top so I can adjust the size of the neck hole as the baby grows.
BURP CLOTHES
The Burp Clothes are essentially done the same way...minus the neck hole.
Dimensions of Burp Cloth: (pre-sewing)
18 inches long
11 inches wide
I know the typical burp cloth is smaller, but hey...those kids can really launch it and I'm taking NO chances. The majority of my shirt will be covered :)
Start out the same way, folding your terry in half and measuring each side. I did a few that weren't perfectly square, but no big deal.
Then lay your flannel on the terry, trace and cut.
Next place your flannel right sides together and then pin pin pin!
Next stitch 1/4in around the entire thing, but leaving a hole so you can flip it right side out. DO NOT FORGET THIS! its very annoying when you do...
Flip right side out and sew all the way around, being sure to seal up the hole. Again I used the zig zag with a 1/4 in seem.
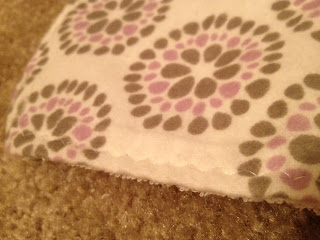
And you have yourself an easy burp cloth!
This was so easy and fun, and it was a great way to use up my random scraps.
Plus they are super cute!


